Why one long post is enough for a week
A long blog post already holds the research, the examples and the opinion. A newsletter, a few social posts and a set of stories are mostly that same thinking at a different length. Writing each one from scratch means doing the hard part five times.
Alessia, a content creator we spoke with, works exactly this way. She writes one long post first, then cuts it into shorter pieces. Everything lives in one big table in xTiles: newsletters, social posts, Instagram stories and outlines. She uses AI for this step, and on purpose only for this kind of step:
"I want to use it for what makes sense using it."
For Alessia that means repurposing, brainstorming and finding patterns in a lot of notes, not producing more for its own sake. The workflow below follows the same rule: plan what you will actually publish, then make only that.
Step 1: keep every format in one content table
Create a collection called Content, one item per piece. The long post is an item too, so the source and everything cut from it sit side by side. Give it these properties:
- Format as a select: Blog post, Newsletter, Social post, Story, Outline.
- Source post, the title of the long post this piece comes from.
- Status: Idea, Draft, Ready, Scheduled, Published.
- Platform as a select, and a Publish date.
Then add views of the same table. A Calendar on Publish date shows the week. A Board by Status shows what still needs editing. A table filtered by Source post shows everything one article turned into. The full setup of the calendar side is in how to create a social media content calendar.
Step 2: map the week before you cut anything
Decide what the post will become before you start writing the pieces. A simple week from one article:
- Monday: publish the long post.
- Tuesday: a newsletter with the main idea and a link to the post.
- Wednesday: a social post built on the strongest example.
- Thursday: a short series of stories that walks through the steps.
- Friday: a second social post with one practical tip, plus an outline for a future piece.
Add each piece as a row with its date and Status set to Idea. Only add pieces you have a slot for. Alessia's warning about AI applies to any repurposing:
"But are you actually using all the emails, all the content that you are producing?"
Step 3 (optional): let Claude draft the pieces
You can write every piece yourself. If you want help with the first drafts, connect Claude to xTiles and give it the post and the plan in one request:
"Read my blog post on the page [post title]. In the Content collection, fill in the rows planned for this week from it: a newsletter, two social posts and a story series. Keep my wording where you can, set Status to Draft and do not add any extra pieces."
The drafts land in the same table as your plan, not in a chat you have to copy from. The last line of the request matters most: it keeps Claude to the pieces you planned, instead of twenty variations nobody will post.
Step 4: edit in your voice, then schedule
- Edit every draft before it moves to Ready. Shorter pieces need a sharper opening than the long post had.
- Schedule each piece in your usual social or email tool, then set its Status to Scheduled.
- Look for patterns once a month. Filter by Source post to see which articles turned into the most useful pieces, and write more like those.
That last step is where AI helps again: ask it to read your Content table and point out the topics and formats that come up most. Alessia uses AI for that kind of pattern finding in her own notes and data.
Free templates for a content repurposing workflow
All four are free in the xTiles template gallery.
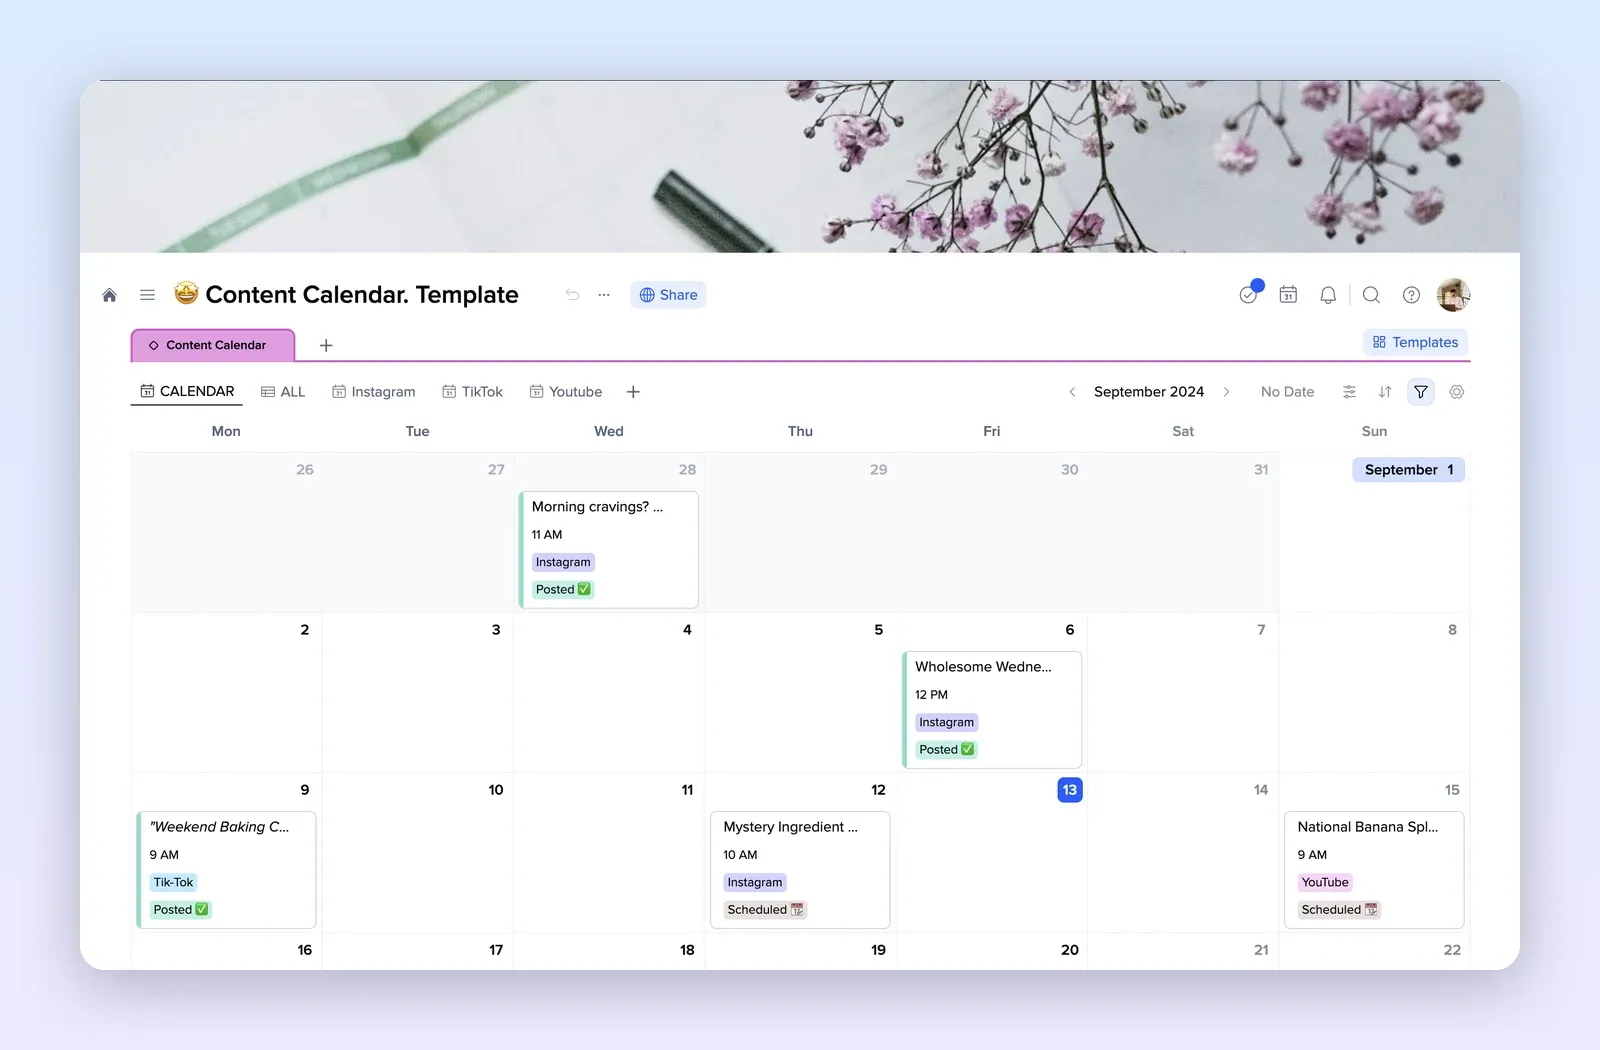
1. Social Media Calendar: the content table, ready made
A collection of posts on a month calendar, with platform, time and status on each card, plus a view per platform. Add a Format and a Source post column and it becomes the table from Step 1. Open the Social Media Calendar template.
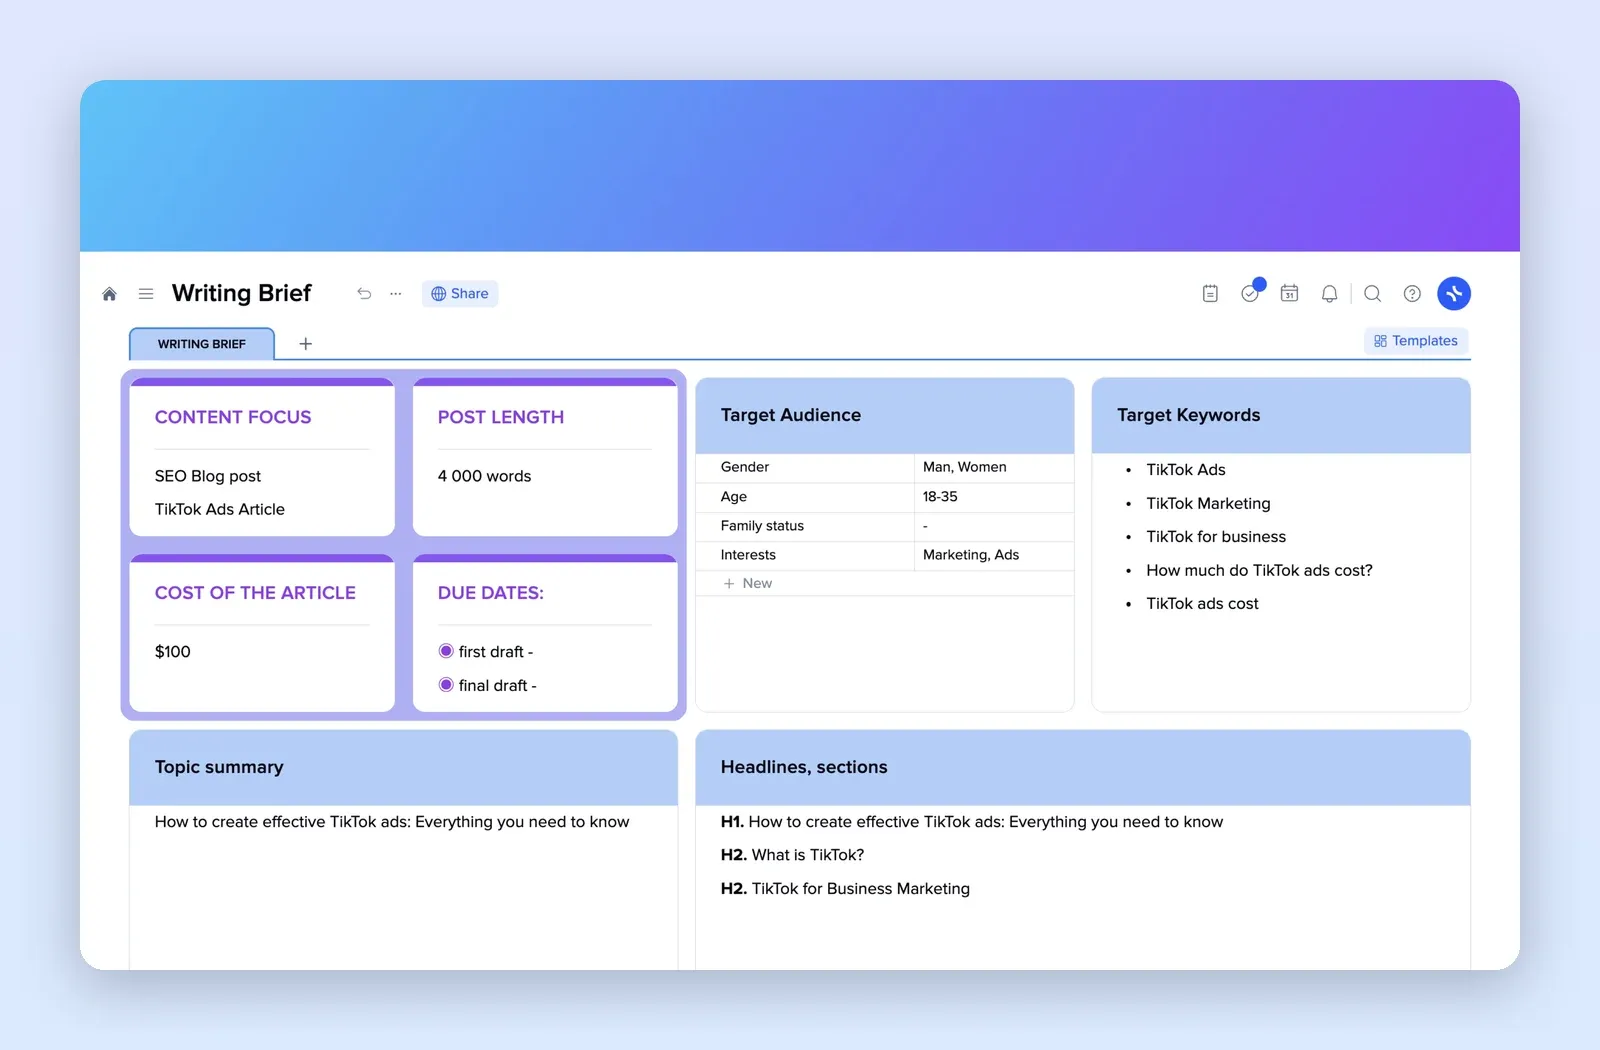
2. Writing Brief: plan the long post
Content focus, length, audience, keywords, due dates and an outline of headings. A good place to plan the source post before you write it. Open the Writing Brief template.
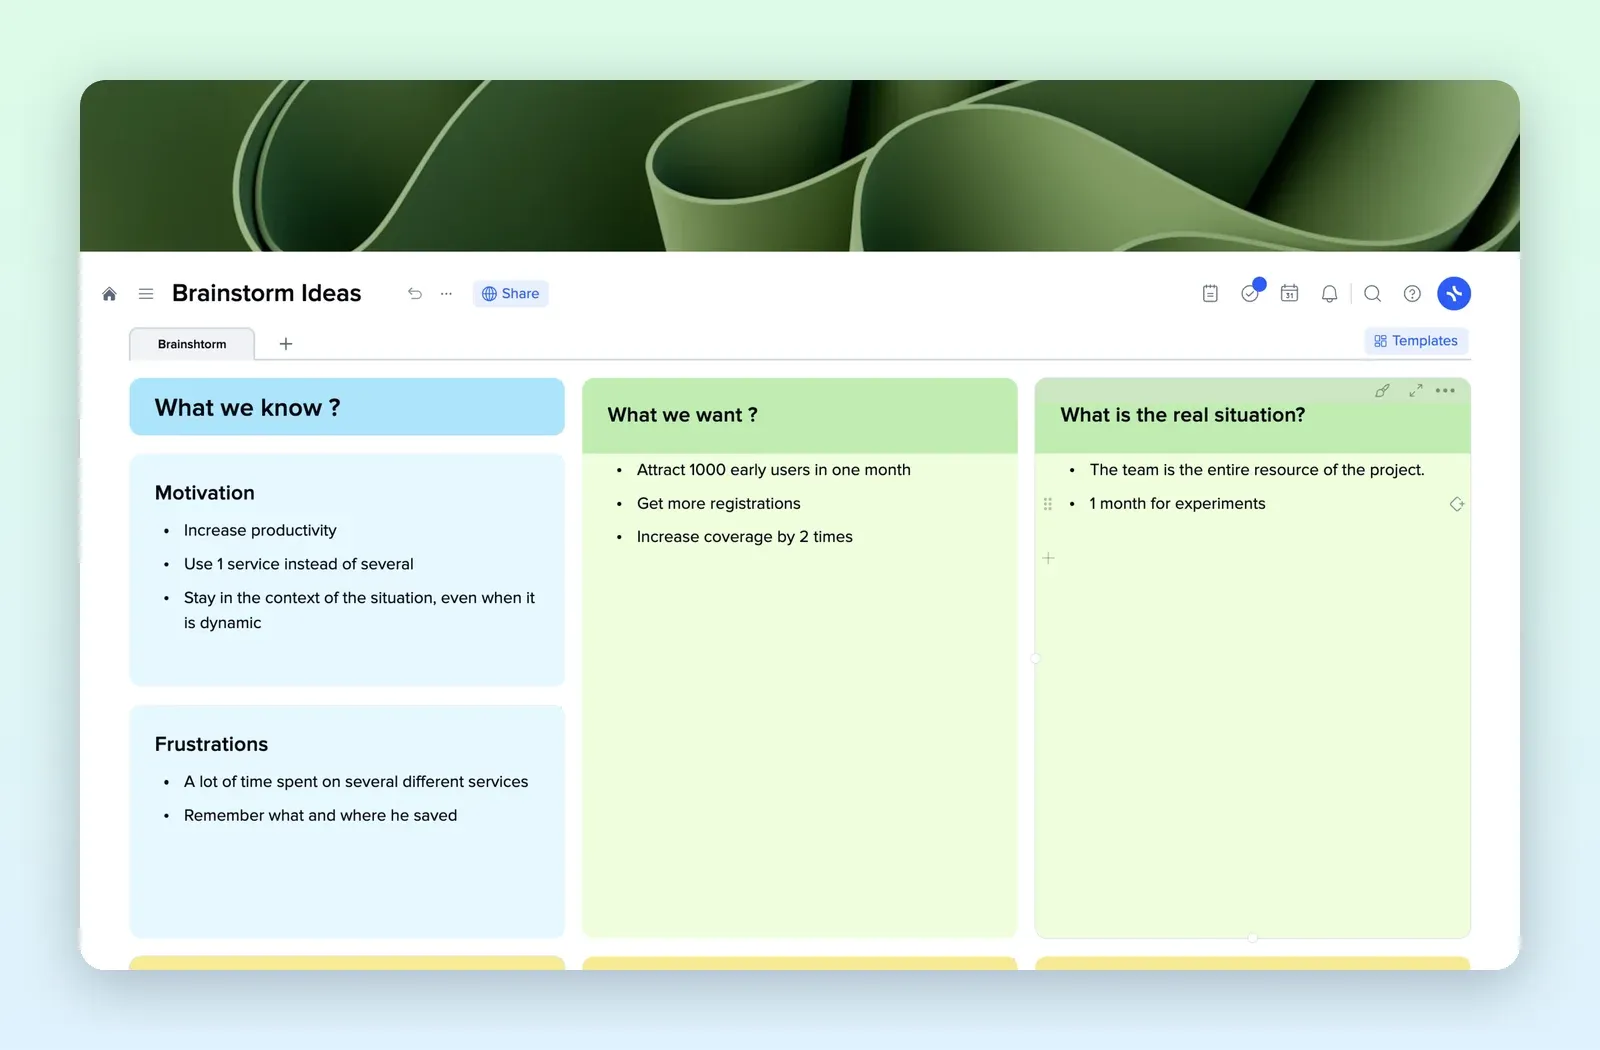
3. Brainstorm Ideas: pick the angles
Columns for what you know, what you want and the real situation, plus idea tiles below. Use it to choose which parts of the post become which pieces. Open the Brainstorm Ideas template.
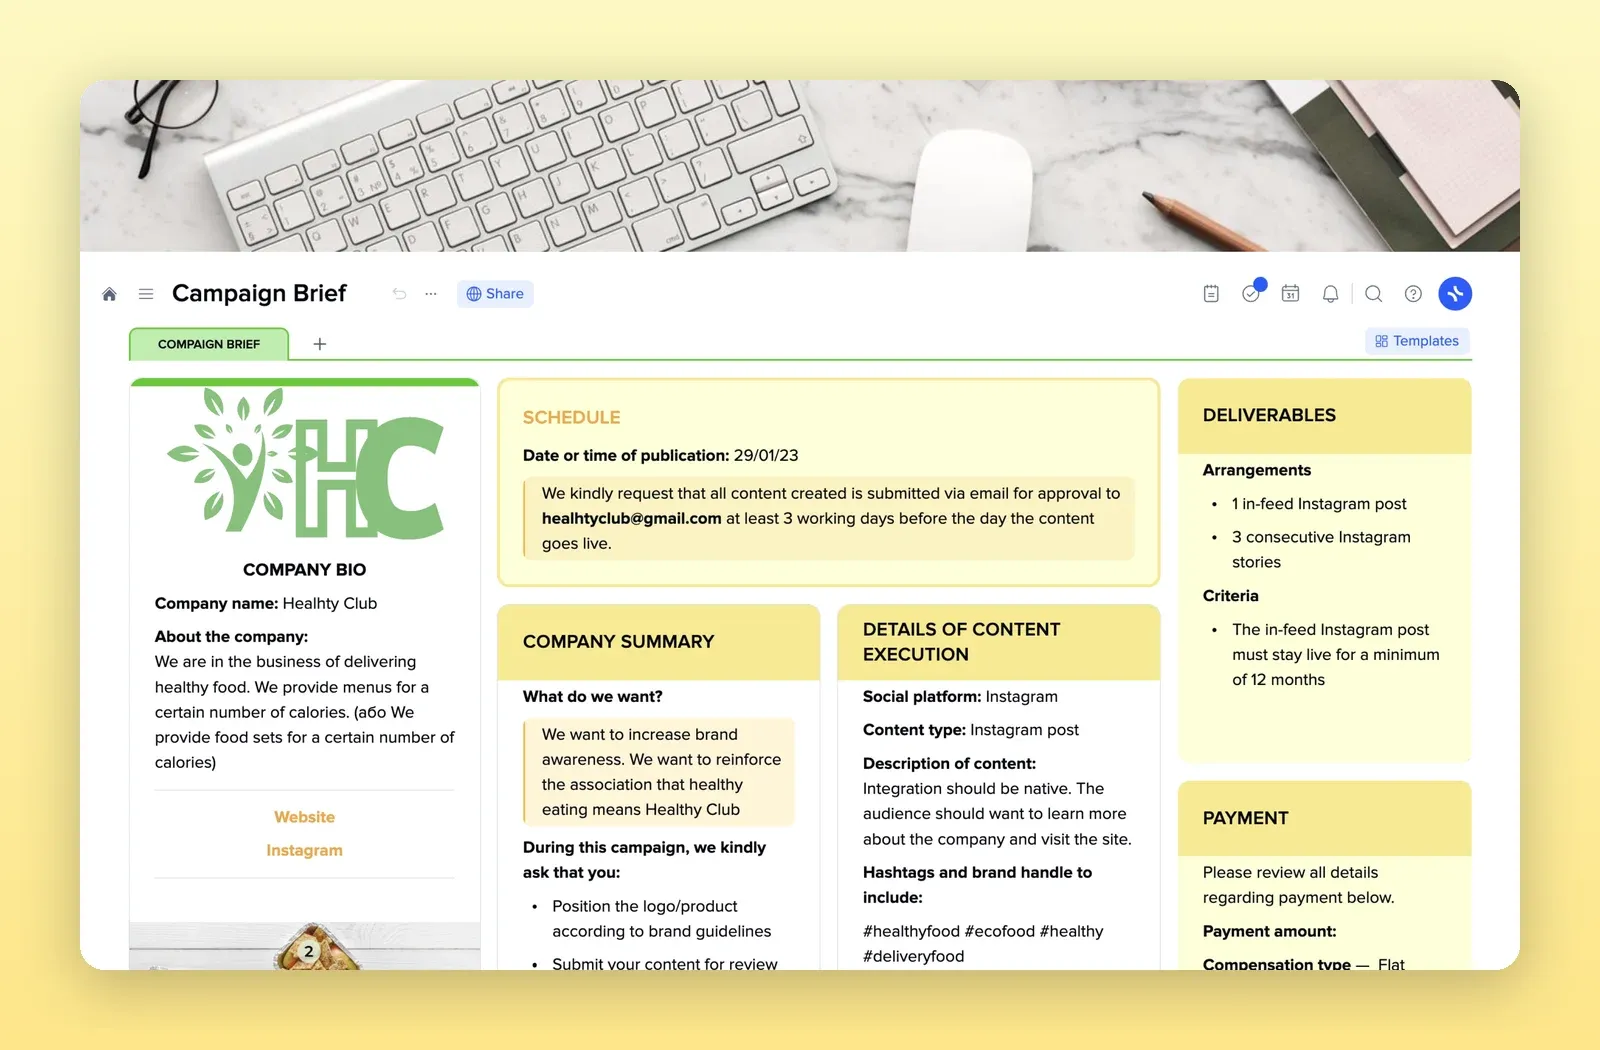
4. Campaign Brief: when the week is a campaign
Schedule, summary, content details, deliverables and payment on one page. Useful when the repurposed week is part of a launch or a client campaign. Open the Campaign Brief template.