Personal knowledge management becomes more and more popular these days as finding something relevant on Google becomes more and more challenging. This shift reflects a growing need for personalized, organized knowledge systems that go beyond traditional search methods and enable more efficient information retrieval and creative thinking.
Building a second brain is a journey that doesn’t have to take all your time and resources to keep the system alive and working. xTiles offers you a pre-designed template where you can save your digital life, organize it, work on it, change it, develop it, etc. The template is build on the PARA method, the most optimal one and tested by millions of other users.
Getting Started with xTiles
thanks to the technology we have today and different apps that allow us to focus on the system itself and what it can bring instead of putting all of our efforts into organizing this system.
xTiles goes further and offers not only tools and features to create a Second Brain but also by giving you a ready-to-use template for this purpose and built-in pre-designed elements to save you time on organizing all that valuable knowledge.
All you need to start is to create an account and choose the xTiles plan that suits your needs. Consider your needs, whether you want to work on it collaboratively, how much storage you may need for your files, etc.
Exploring the xTiles Second Brain Template
The next step is to add the relevant template to your workspace. Click the blue button on the upper right. The app will redirect you to your project immediately. Later, you can find it on the main page, in “recent.”
The xTiles Free Second Brain template is a system designed according to the PARA method developed by Tiago Forte. However, this template can be easily changed to adapt to your preferences or needs in case you find the methods aren’t working for you quite well.
Here’s what you will get by choosing to build your second brain in xTiles:
- Flexible workspace design with an intuitive drag-and-drop interface.
- Ability to add multiple content types.
- Quick note-taking and information-capturing capabilities.
- Interconnected knowledge mapping.
- Ability to use your non-linear thinking and creative associations.
- Cross-platform accessibility.
- Powerful search functionality
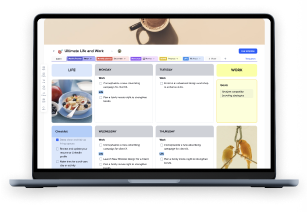
These features can guarantee you concrete results for your PARA system. Additionally, as you can see from the picture, our template has one more page – the dashboard. That will be your control panel for short access to any part of your Second Brain. It also has a designated space for your weekly planner and notes, turning a traditional concept of a Second Brain into a system that can be easily applied to everyday life.
Step-by-Step Guide to Building Your Second Brain
Many of us spend countless hours consuming information, yet struggle to make practical use of what we learn. Creating a Second Brain isn’t just about storing information. It’s about transforming how you interact with knowledge in your daily life.
Personal knowledge management doesn’t have to be complicated even though it sounds like it is. It can be pretty basic, but if it works for you – you achieved the goal. Congrats!
Your own second brain doesn’t have to consist of multiple tabs and dozens of elements if you’re a beginner. Start slowly and develop gradually. That is what xTiles offers you – complete freedom of action.
Our Second Brain Quickstart guide consists of two parts: the technical part on how to use the platform to get the maximum of and how to keep your Second Brain working in the long run.
Step 1: Projects
The “Projects” page is for short-term efforts that have a clear deadline, such as finishing a report, planning a vacation with your family, renovating your living room, etc. Every page has clues regarding its content, so it will be easier if this is your first time creating a Second Brain and you don’t want to constantly switch between our guide and your project.
In xTiles, you get three possible views (board, calendar, and table) for your Projects to help you navigate among all the tasks you have efficiently because our template uses Collection pages – a special kind of page for creating logical and diverse knowledge bases.
You won’t have to input the data three times, as the page synchronizes automatically, so you can use the view you prefer.
- Boars view: Project by status
The board has separate columns for your tasks depending on their status. You can add more columns if you need. For example, some of your projects are temporarily on hold, but you can’t move them to Archive just yet and you need a dedicated category. Scroll right, then after the last column you will see a button “new group,” press it. Choose the color you want to assign for this column for better visual organization and start adding your tasks or move them from other columns using the drag-and-drop feature.
- Calendar
This view allows you to plan better having a full picture of your time in front of you. Also, if you have an xTiles Starter plan or more, you can integrate your Google Calendar into your xTiles workspace, creating an even more advanced picture of your load.
- Table: priority
Both, Calendar and Board have priority filters visible, however, this view helps you collect all of your projects with the same priority level into one table to better understand how to distribute your tasks evenly throughout your week or month.
Every Project, no matter the chosen view, opens as a separate card over the whole page. There, you can add more properties for better organization. Also, on a card you have space for a detailed to-do list for this project, you can create tasks with reminders for better time management, add tables, format notes, etc.
Every card is a separate world, where you can go as deep on your project as you need in order to get it done the best you can.
You can move items to other pages. For example, you have a Project that seems to become too time-consuming, so you need to move it to Areas to work on it from this point of view. Open the needed card and press the three-dot menu on the right upper corner and choose “Move to collection,” then choose the needed page. Then, go to this page and organize your new element there. Please note, that the properties it had on its primary page, will disappear, but all the informational content you added beneath them will remain.
Also, you can duplicate your card to another page. For this move, choose “Add to Collection” in the three-dot menu and choose the destination.
Step 2: Areas
Areas, unlike Projects, are your long-term responsibilities that need constant attention. Usually, they don’t have a strict deadline. To this category, you can add taking care of your health, family responsibilities, career goals, etc. It’s important to take a self-paced course to master your ability to fill up your Second Brain with digital information that will be of use later.
This page is built in the form of a board since there will be no deadlines, so you don’t need a Calendar. However, if you want to allocate time for certain projects in your areas, you can easily add the needed property to every card, and then add a Calendar view to the page. The same can be done with prioritization.
Also, you can add more areas, by adding new groups to your board, just like you did with the statuses of your Projects on the previous page – after all columns, you can find the button to add more.
Step 3: Resources
The Resources page is for all the materials you may need to work on your Projects and Areas. It can be texts, podcasts, documentaries, etc. This page is in the form of a table by default to let you see all the properties without a need to open cards. However, you can add a new view if you need. For example, you can create a board based on a resource type or topic.
Step 4: Archive
When something becomes irrelevant right now, you can move it to Archives – the last destination, where your Projects, Areas, and Resources are gathered in case you need them again. These items can be returned where they belonged whenever you need them again.
After some time, the Archive page will become especially extensive. For this case, you can add a board view and have them sorted on their place of origin, for example. This way, it will be much easier to navigate your knowledge base.
Advanced Strategies for xTiles Users
How many brilliant ideas have been lost simply because people didn’t have the opportunity to capture them? How much useful advice have got lost in your memory due to the same reason? Some people use Apple Notes or another notes app of their choice for quick capture, while others prefer more specialized tools. However, Apple Notes isn’t suitable for building a Second Brain that will work and will be easy to use, which means you will have to use at least two apps to make this possible.
With xTiles mobile app, you can use your smartphone or tablet as an extension of your Second Brain to store everything you need, edit it on the go, save new content (it works as a mobile web clipper), and have access when you’re far away from your computer.
Another advanced strategy to enhance your experience is installing the xTiles Web Clipper, which will help you store the informational content (whether whole pages, text snippets, or visual elements) while browsing the internet. The captured information will go to the Inbox – a repository for the information to be sorted later.
Integrating Your Second Brain with Daily Life
While you can follow a brain-quickstart guide to get moving, the real magic happens when you adapt the process to your own pace and style. Think of your second brain journey as a personal evolution rather than a rigid system. You’re the one in control, not the PARA system or template.
The key is focusing on capturing the most valuable ideas rather than everything you can put your hands (or rather eyes on). Every time you see something interesting, ask yourself: “How might this be useful in the future?” This simple question helps filter signal from noise.
During your creative process, your second brain becomes an active participant rather than just an archive of valuable knowledge. Those fragments of inspiration you collected last month might spark how many insights and unexpected connections you never would have thought about when combined with your current project. It’s like having a conversation with your past self.
The goal isn’t to build a perfect system but to create a living, breathing extension of your mind that enhances your daily work and creativity. When properly integrated, your Second Brain reduces cognitive load and creates space for deeper thinking and a life-changing experience.
Optimizing Your Second Brain System Over Time
Building a Second Brain isn’t a one-time setup but an evolving practice that will grow with your needs. Many people feel constant pressure to capture everything in digital form, leading to information overload. Instead, focus on collecting actionable insights that directly contribute to your creative output. Whether you’re reading online articles or attending meetings, ask yourself if the information will genuinely serve your future self.
Take your own time to discover what works. Some find a proven method right away, while others need to experiment with different approaches. The key is preventing valuable information from becoming slowly forgotten by regularly reviewing and connecting your notes, which can be easily done in xTiles thanks to nested elements and backlinks.
Building a second brain shouldn’t feel like another task on your to-do list. If it feels this way, consider changing your approach to how you save content and what type of content you normally add to your system to unlock your creative potential.
Pay attention to which parts of your system you actually use versus what’s just taking up space and adapt the system accordingly to ensure only the best ideas are saved to become even better plans in the future.
Conclusion
Building a Second Brain is a transformative journey of personal knowledge management that empowers you to capture, organize, and use your most valuable insights. With xTiles Free Second Brain template, you can effortlessly create a dynamic system that grows with your evolving needs and sparks creativity.
Ready to revolutionize how you manage information?
Take the first step today:
- Create your xTiles account
- Import the Second Brain template
- Start capturing your most promising ideas
Don’t let valuable knowledge slip away. Transform how you think, work, and create by building a Second Brain that truly works for you. Your future self will thank you.
FAQ
Can I customize the xTiles Second Brain template to fit my needs?
Yes, the template is highly adaptable. You can modify views, add new columns, integrate with Google Calendar, and adjust the organization to match your workflow. The system is designed to evolve with your interests, projects, and goals, allowing you to create a personalized knowledge management system.
How does the xTiles Second Brain template work?
The xTiles template uses the PARA method (Projects, Areas, Resources, Archive) to organize information. It provides a flexible workspace with features like a drag-and-drop interface, multiple content types, cross-platform accessibility, and powerful search functionality. The template includes specialized pages for Projects, Areas, Resources, and Archive to help you manage information effectively and a Dashboard page for quick access and notes.
Can I use xTiles Second Brain on multiple devices to be able to save information on the go?
Yes, xTiles offers cross-platform accessibility. You can access and edit your Second Brain from your mobile phone and computer. The mobile app allows you to store content, make edits on the go, and sync seamlessly across devices. Additionally, the Web Clipper browser extension helps you capture online content, making information management flexible and convenient.


