Earning passive income by selling on Etsy digital planners is an incredibly convenient way that requires minimal investment yet may generate huge revenue. The perpetual demand for digital downloads and templates ensures a steady stream of customers, and once you’ve designed and listed your products, Etsy takes care of the rest.
Despite their affordability for customers, ready-to-use customizable xTiles Templates can generate substantial revenue for your Etsy shop. A quick search on Etsy for “templates” or “printables” reveals numerous top sellers boasting thousands of successful sales.
Prepare, as this comprehensive guide will lead you through the essential steps to kickstart your Etsy template-selling journey. Additionally, we’ll provide you with some fantastic ideas to help you get started right away and tell you where to find inspiration when you feel mentally drained.
Creating your templates and selling them through Etsy may become a great way of passive income. All you need to do is create digital products that answer questions your potential audience has, and Etsy will take care of the rest. The platform charges $0.20 per listing and 5% per sale, along with applicable taxes based on the country. As you can see, your financial investments in your new business will be minimal compared to other businesses.
Etsy is a perfect place to sell your products as it streamlines the entire process by handling payments and allows you to set various shipping profiles and delivery times according to different regions, making it hassle-free.
While certain printables or digital products may require specific skills or knowledge to create, which might take months or even years to learn and master, templates can be produced without any special abilities or prior experience.
From the customer’s perspective, templates offer convenient and, most importantly, quick solutions for DIY projects, education or work needs, household needs, hobbies, etc., saving time, and are always in high demand.
Advantages of selling digital planners
Planners are undoubtedly one of the best products to sell on Etsy because creating digital planners can be incredibly simple. With a pre-defined, well-known structure, you don’t have to reinvent the wheel when attempting to create something new. Effortlessly designing numerous attractive digital planners gives you the opportunity to earn extra income.
The best part of selling digital products, such as planner templates, on Etsy is that you won’t have to deal with delivery, quantity, or quality issues. Customers can conveniently download their digital planners and access everything they need. This means that your place of residence and its delivery opportunities have no impact on how well you provide your clients with the purchased product.
The beauty of selling digital planners lies in the fact that you only need to upload them once, and they will continue to sell. While occasional adjustments may be needed for mistakes or design issues, as you become a skilled creator, the list of potential mistakes will steadily decrease.
The process of creating digital planners allows for unlimited imagination and creativity. Customers appreciate unique designs that match their preferences and align with current trends. Your creativity will undoubtedly fuel their desire to keep purchasing from you.
Why sell your digital planners on Etsy?
Among all the available platforms for selling digital products, Etsy stands out as a leader due to several key factors.
Firstly, creating your own store on Etsy is not only straightforward but also comes with no fees. Below, you can find a detailed guide on how to set up your store effortlessly.
Moreover, Etsy allows you to fully customize your store, enabling you to reflect your brand and unique style. That’s almost like your website, only you don’t have to pay money to create and manage it, which is just a perfect option for newcomers who can’t or don’t want to invest money in their enterprise. These customization options set your store apart from others selling similar products, helping you create a distinct and memorable identity.
Secondly, selling digital products on Etsy is a seamless process. The platform is designed to streamline the entire selling experience, making it user-friendly and efficient for sellers.
Lastly, digital planners have become highly popular products on Etsy in recent times. You can even find specialized courses on how to sell digital planners on Etsy created by people who already make money on it.
With people increasingly seeking to organize their lives and schedules, creators have responded by offering a vast array of options. As a result, the market for digital planners is thriving, and there is still plenty of room for new sellers to join in.
In conclusion, Etsy’s perfect combination of a free setup, a user-friendly selling process, and the current popularity of digital planners make it an attractive and advantageous platform for sellers. By leveraging these features, you can attract a broad customer base and potentially generate significant sales.
How to create a store on Etsy?
You can start creating digital products to sell on Etsy in two ways. You may start your templates selling enterprise by creating templates for sale or by establishing an Etsy store first to learn more about the platform, check whether it suits you completely, and get used to it.
Setting up an Etsy store to sell your appealing templates is a straightforward process. If you don’t have an Etsy account yet, just follow these simple steps to get started:
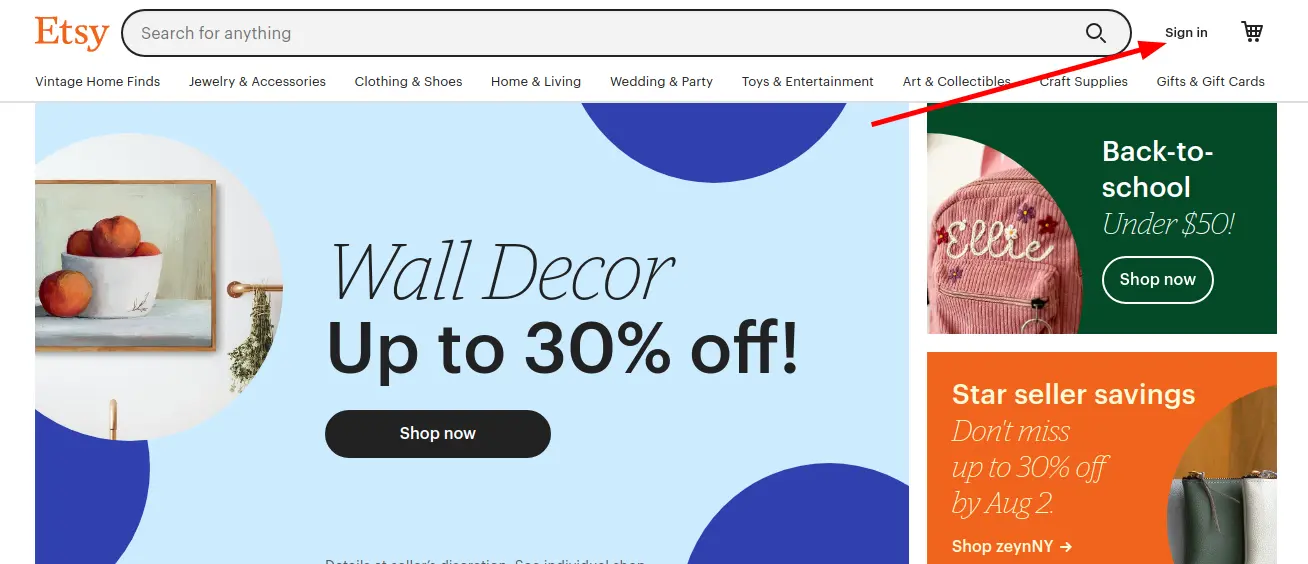
1. Create an Etsy store:
Go to the Etsy website and click on “Sign In” to create a new account with your email and password. Make sure your password is reliable enough so that when your store starts to provide revenue, you won’t be at risk of losing it.
Initially, you can also use this account as a customer for browsing and purchasing from other sellers’ items or products you like or need for your store.
2. Upgrade to a merchant account:
In the upper right-hand menu, click on “Your account” and then select “Sell on Etsy.” Then, on the opening page, scroll down and click “Open your Etsy Shop.”
Now you will need to fill in the required information, including language, country, and currency preferences. Also, specify whether you’re a full or part-time seller.
3. Choose your Etsy store name:
Enter a unique name for your Etsy store. This part of registering your store is the hardest as you need to come up with something unique that represents what you do and is catchy enough so that it sticks to your customers or passersby’s minds. However, you can always change it later if needed, but please note that any rebranding after you get certain popularity may slow your progress for a bit as the existing customer will need to proceed with changes.
4. Add your first item:
To complete the Etsy shop setup, stock your shop with at least one item. If your templates are ready, you can create listings for them right away. If not, you can generate a mockup product and add a picture along with the necessary details.
Keep in mind that Etsy charges $0.20 for each listing, so it’s best to prepare your items diligently before experimenting extensively to avoid unnecessary investments.
5. Set up payment and billing:
Set up your preferred payment and billing options. You can add a bank account or card for transactions whenever suits you best.
When adding a card, be ready that it will be verified, charged, and refunded with a micro-transaction during the setup process, so its balance has to be higher than zero.
Sometimes this verification step might take a few days and may require contacting Etsy support for assistance if needed. However, that’s just an additional time for creating your templates.
Once you’ve completed these steps, your Etsy store will be up and running, ready to showcase and sell your printables to customers.
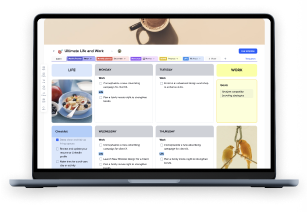
How to create an xTiles digital planner to sell on Etsy?
If creating templates for sales is an easy way to earn money, then creating xTiles templates is even easier. The most popular tool creators use is Canva, which requires some onboarding and skills. With xTiles these are unnecessary. The same customizable options are available without hard-to-get commands and numerous nuances with fonts, sizes, rich content, etc. Additionally, you can use templates from the xTiles Templates Gallery as a base for your own ideas to shorten the time you need to create a file from A to Z even more.
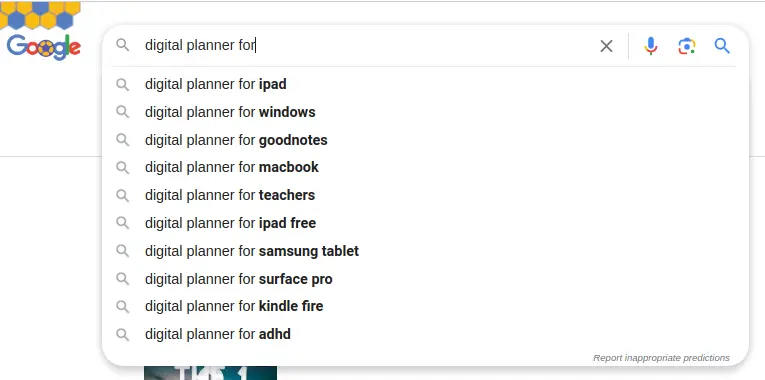
To become a successful seller on Etsy, you need to create planners that people are actively searching for. But where can you find such information? Google is the answer, but not in the traditional way of searching. Try typing phrases like “planner for” or “digital planner for” to see Google’s suggestions. These suggestions change over time based on people’s searches and current trends. Additionally, check the bottom of the page for related requests to gather more insights.
At xTiles, we are delighted to share with you information about our most popular planners, helping you understand the market’s demand. The planner that is an absolute champion is probably no surprise to you – it’s the Weekly planner. People find planning their lives by weeks to be the most convenient time interval – not too short to repeat frequently and not too long to maintain control over unforeseen circumstances.
Following closely, the second most sought-after planner is the Health and Fitness planner. This trend reflects the growing interest in maintaining a healthy lifestyle and staying active. These planners need to be easy to use, intuitive, and somehow inspirational to encourage users to keep going with their fitness and diet goals.
The bronze goes to the Trip planner, as the human desire to explore new places probably won’t disappear anytime soon. Now, with the help of digital products, planning trips has become even more accessible.
The fourth most popular planner among xTiles users is the Daily planner. It can complement your weekly or monthly planner or serve as an independent tool for detailed daily scheduling. It’s particularly useful for individuals with irregular working hours or shifts, providing a structured approach to planning their daily activities.
It’s important to draw on your own experiences to create unique products. However, finding inspiration in other creators’ planners and products is perfectly acceptable as well. By blending these two approaches, you can develop wonderful ideas that will resonate with individuals who have specific needs and requirements. Embracing both personal insights and external inspiration allows you to craft innovative and appealing products that cater to a diverse audience.
Also, a good strategy is to incorporate recent trends into your template to answer the fast fashion demand. While these templates may not have long-term viability, they can significantly boost your income when significant cultural or social changes or situations occur. Being adaptable to current trends allows you to capture the attention of a broader audience and capitalize on the immediate demand for relevant and timely products.
With this information in mind, let’s create each of these popular planners to sell on Etsy and generate income.
How to create a weekly planner?
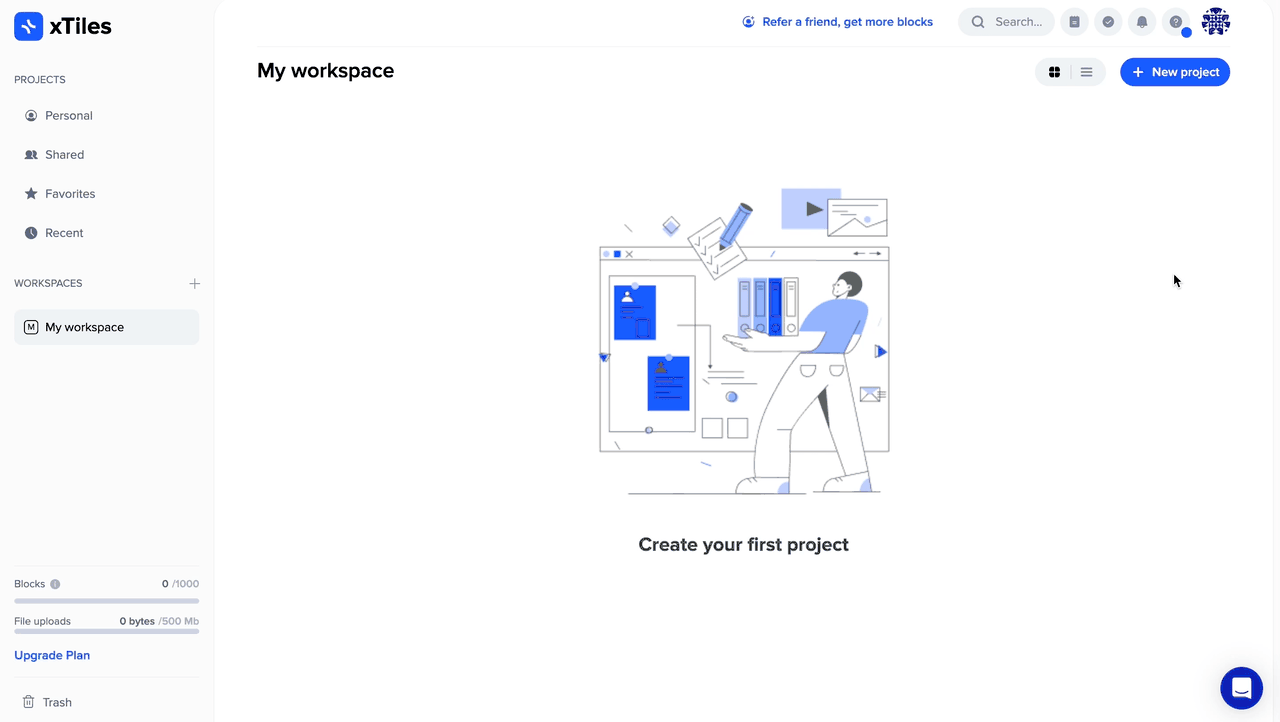
If you don’t have an xTiles account, creating one is a quick and easy process. Simply click on “Sign up for free” at the upper right corner of the page, and you can continue using your Google account to sign up. In just a few seconds, you will find yourself in your personal workspace. Rest assured, your future experience with xTiles won’t be more challenging than the registration process.
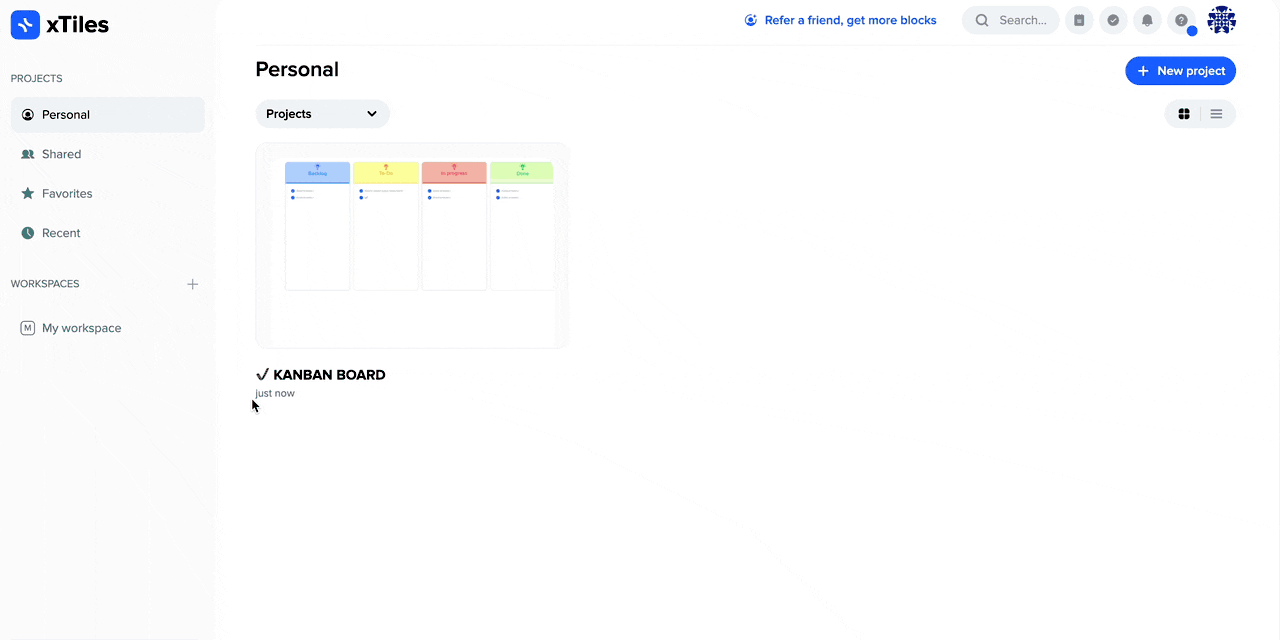
To get started, look again to the upper right corner of your screen and click on the “New project” button to create an empty file. From here, you have two options: you can either begin creating your planner from scratch or utilize the xTiles assistant located on the right side of the empty canvas and choose the “Weekly planner classic” template.
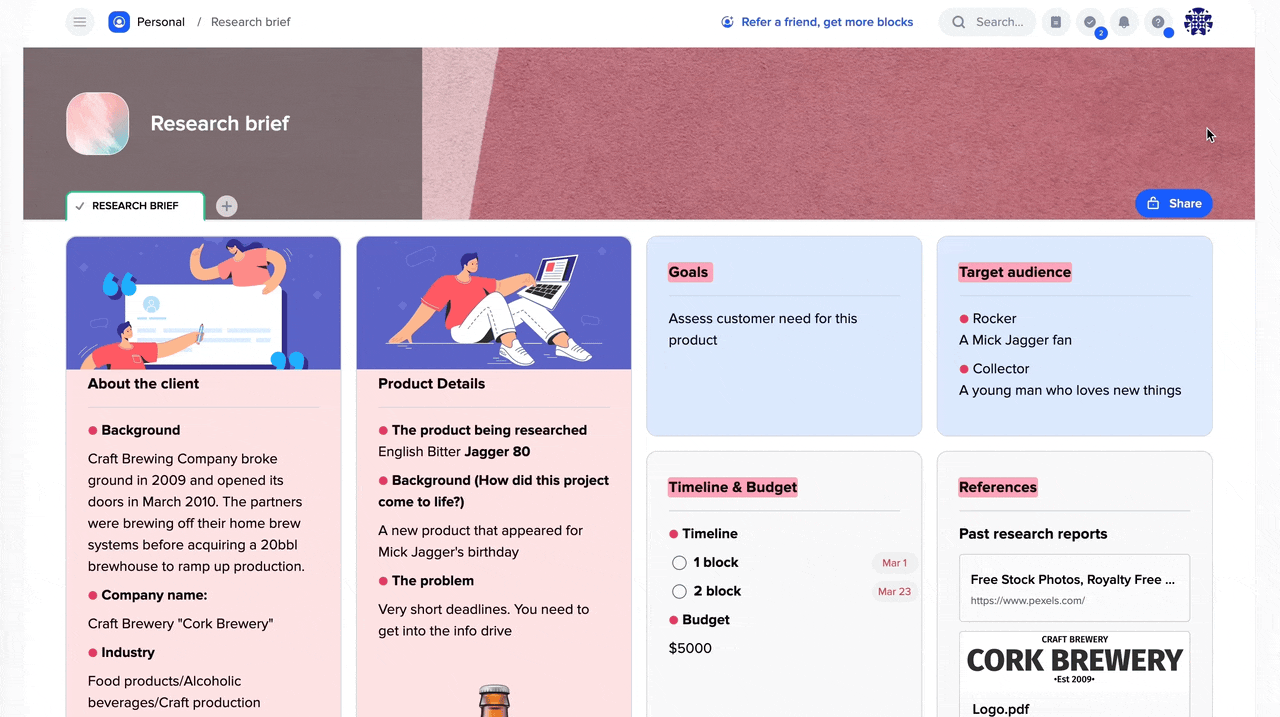
Let’s explore both scenarios. If you prefer not to use our pre-designed templates, the first step is to sketch the structure of your planner. Consider whether you want to list all days in a long format, where users need to scroll, or if you prefer a space-saving layout.
Next, select a color spectrum for your weekly planner. The beauty of xTiles is that you can retain the same structure and elements while choosing different colors, giving you the flexibility to create multiple planners with unique designs to offer for sale.
Additionally, think about whether you want to add other sections besides the days of the week. This can be the key to making your templates stand out and resonate with customers. Consider elements such as a shopping list, a list of books to read, space for journaling thoughts during the week, and more. Think about what features you personally find lacking in traditional planners and incorporate them into your design.
Once you’ve finalized the template, don’t forget to thoroughly test it yourself. This is a crucial step for any digital product to ensure that your first clients do not encounter mistakes, typos, misaligned elements, or any other issues. The fewer problems your clients encounter, the better their reviews will be, ultimately enhancing your credibility as a creator.
At times, spotting mistakes or areas that need improvement in your template can be challenging. Therefore, it’s highly recommended to share your template with someone else before uploading it for sale on a marketplace. This could be a friend or a fellow creator who can carefully analyze and test it. xTiles offers the ability to share your documents with anyone on the Internet.
To showcase the potential of your template, avoid leaving it empty. Instead, utilize placeholder content that represents the actual content users will insert when using the template.
This stage is critical and demands attention similar to the design process because it allows you to prove the usability of your template. While you have the option to manually fill in all the sections, a quicker approach is to use generic text, generate content with AI tools, or incorporate the dummy images and sample data.
Once your project is finished, use the “Turn into a template” button in the three-dot menu located in the project header. Your project will magically transform into a template. To access it, head over to the service’s template gallery and find it in “My templates.” Now, your template is readily available for use and sharing with the world.
How to create a health and fitness planner?
A health and fitness planner may resemble your weekly planner at first glance. However, given the multiple aspects to consider, such as tracking activity, diet, goals, water intake, groceries, body measurements, and more, it requires additional effort.
Start by determining the purpose of your health and fitness planner. Do you want it to serve as a general template for individuals without specific goals or chronic conditions to track their activity? Or do you envision it as a useful tool for people with diabetes or heart diseases who aim to manage their body shape effectively? Whichever direction you choose, it’s essential not to overwhelm your planner with every possible feature. Consider creating multiple versions, allowing your clients to select the one that best suits their needs.
Depending on the planner’s purpose, define its sections accordingly. By tailoring the content to address specific health and fitness goals, you can create a valuable and user-friendly planner that meets the diverse needs of your clients.
The most common sections to include may be:
- Workout routine
- Meal planning
- Water intake
- Weight and measurement tracker
- Fitness goals
- Progress and reflection
It’s advisable to create separate pages for each major section in your health and fitness planner. For example, if the water intake section doesn’t require much space, consider placing meal planning on another page for better organization.
When designing your fitness and health planner, adding motivational elements or leaving empty space for personal notes aligning with individual goals is a thoughtful and intelligent idea.
Now, revisit your color choices for the planner. Offering your planner in a couple of different color schemes will provide customers with options to suit their preferences.
Before marketing your health and fitness planner on Etsy, be sure to thoroughly test it to eliminate mistakes or inconvenient sections that may hinder its main purpose. Ensuring the planner’s usability and practicality is essential for a positive customer experience.
The results of your testing can serve as placeholder content to showcase your planner’s capabilities to potential buyers. An empty planner may not look as appealing on your shop page, so presenting a well-designed and tested version will attract more interest.
Once you’re satisfied with your fitness and health planner, save it using the “Turn into a template button” to make it readily available for purchase by your customers. Following these steps will help you create a successful and valuable health and fitness planner for your Etsy shop.
How to create a trip planner?
A trip planner template, like any other planner template, can come in various styles and types. However, it’s essential to draw from your own experiences to create a product that not only looks appealing on the screen but also functions effectively in real-life scenarios.
Trips themselves vary significantly. A hiking trip in the mountains with tents differs greatly from a luxurious stay in Paris, where you dine in restaurants and stay in high-end hotels. As such, it’s essential to create different templates catering to various types of trips, whether they are longer or shorter, all-inclusive or budget-friendly, and more.
Determining the purpose of your trip planner is key to crafting a planner that truly assists people. Consider whether you want your planner to encompass all aspects of a trip, including itinerary planning, packing, accommodation, transportation, and activities, or if you prefer to create separate planners for each of these elements.
Once you’ve established your focus, you can then plan the sections of your trip planner accordingly. The most common sections to include may be:
- Destination information
- Itinerary
- Accommodations
- Transportation
- Packing checklist
- Budget and expenses
- Notes
- Places to visit
- Things to buy
Just like you did with the health and fitness planner, you may create separate pages for all bigger sections. A packing list is definitely better to place on another page, so it won’t bother you later when you’re on a trip. Or you may go further and create a separate planner and offer it as a nice bonus to those who buy your trip planner template. For example, if you sell a planner for people heading to explore mountains, you may also offer them a special packing list for hikers. Yes, such an approach may take time if you don’t have relevant experience, yet it proves how focused you are on satisfying each and every one of your clients.
As a base, you may use the xTiles Packing Template, adding the needed categories of items depending on the trip style.
Now, create the needed sections, placing them in intuitive and easy-to-read order. A user-friendly layout is a key to clients’ hearts as it requires minimal effort from them to turn an empty template into their very personal planner.
Choosing colors and rich content to create a certain vibe is totally on you. Use your creativity to present your planner’s- potential to the fullest.
The last steps are similar to the last steps you made with the weekly planner and health and fitness planner. Test your planner, add placeholder content to show its possibilities, and save it using the “Turn into a template button”.
How to create a daily planner?
Finally, let’s make your daily planner for sale on Etsy. After the first three, you already know the basic principles and creating abilities xTiles offers, so let’s discuss some nuances.
Once again, you will need to decide if you want to focus on time management, productivity, goal tracking, habit formation, or a combination of these elements in your future planner. How many of these do you want to present to your potential clients?
When you decide on its main purpose, you can define what sections you need to implement. Some of the most popular elements of daily planners are:
- Daily schedule
- To-do list
- Goals and objectives
- Habit tracker
- Notes and reflection
Remember that there are only 24 hours, so you need to find an optimal quantity of sections for your planner. Otherwise, people might feel frustrated with a planner where they constantly can’t fill in specific sections.
The next step is to create an aesthetically pleasing and user-friendly layout. Use colors, fonts, and graphics that will align with the theme and enhance the overall user experience. You may multiply the daily planners available in your shop by changing color schemes.
When working on a design, it’s one step away from “I’m going to make something very interesting and useful” to a planner that is more of a riddle to clients. That’s why it’s important to keep your design user-friendly and intuitive so a person can start using your products without long introductions.
After every element and detail are in its place, it’s time to add placeholder content to show what your planner can do and test it. It may be your daily plan or something funny which might make people smile and convince them to buy your product.
When everything is done, just press the button “Turn into a template” again, and voila! One more template to ensure you a passive income is ready!
How to sell your xTiles digital planner on Etsy?
Now that your planners are finished, polished, and tested, they are ready to be presented to the world and everyone is willing to purchase them.
Setting up a digital planner/product listing on Etsy is quite similar to creating a regular listing, but there are a few key differences you should be aware of:
- Images:
When showcasing digital products, avoid using real-life images as they may confuse the customer. Instead, opt for mock-up images created using Canva or Photoshop to demonstrate how digital products work effectively. For more insights, check out my top tips on creating the perfect digital planner Etsy images.
Product Type: Select “Digital” as the product type to inform both Etsy and the customer that it’s a digital listing with no physical product delivery.
- Description:
Be explicit in your description about what the customer will receive. Mention that it’s a digital product, clarifying that nothing will be physically shipped. Also, specify the number of files the customer will get and outline your refund and exchange policy to give customers a clear understanding of what you’re offering. For further guidance, refer to my top tips on creating an SEO Etsy listing description.
- Quantity:
Digital products are everlasting and intangible, so there’s no need for stock measurements. Set the quantity to 999 (if possible) to avoid renewing the listing after every sale. Unfortunately, Etsy doesn’t offer an unlimited option yet.
- Upload Your Files:
Utilize the “digital files” section to upload up to five files, with each file’s maximum size being 20 MB. If you have more than five files, consider using zip files to merge them into one.
- Tags and Keywords:
Include relevant tags and keywords in your listing. Keywords such as “digital download,” “PDF file,” “instant download,” “digital file,” and “digital planner” will help potential customers find your listing more easily.
A few words to conclude
Creating planner templates for selling them on Etsy is an ongoing process. Monitor your clients’ feedback and objections to iterate your existing templates and make future ones more beneficial.
Taking a customer-oriented approach helps creators build credibility, showcases their business’s awareness, and fosters healthy communication with their clients.